Print-Ready PDF Posters: Sizes, Fonts and Checks Before You Send It to the Printer
What a print-ready poster PDF needs: the exact size, embedded fonts, sharp images and a final check at 100 percent. How to get one from PosterScientist, with or without Pro.
By PosterScientist · Published · 7 min read

Quick answer
What makes a poster PDF print-ready?
A print-ready poster PDF is a single page at the exact final size (for example 48 × 36 in, or A0 at 841 × 1189 mm), with every font embedded, images at 150 to 300 dpi at that size and nothing important within about 2 cm of the edge. PosterScientist's PDF export is a Pro feature; free accounts can export PowerPoint and save that as a PDF.
Most poster printing problems are not the printer's fault. They come from a file at the wrong size, a font that was never embedded, or a figure that looked fine on a laptop and turns out to be 60 dpi on paper. A print-ready PDF avoids all three. This guide explains what that means in practice, how to check it, and how to get the PDF out of PosterScientist with or without Pro.
What "print-ready" means for a poster
A print-ready poster file is:
- One page at the exact final size, not a 16:9 slide that someone has to enlarge. If the conference asks for A0 portrait, the page is 841 × 1189 mm.
- Fonts embedded, so the printer's computer draws your text exactly as you designed it.
- Images sharp at print size: about 300 dpi for detailed figures, 150 dpi for large photographs.
- Charts as vectors where possible, so lines and labels stay crisp at any size.
- Safe margins: no text or logos within about 2 cm (0.75 in) of the edge, because many printers trim or add a white border.
1. Confirm the size before anything else
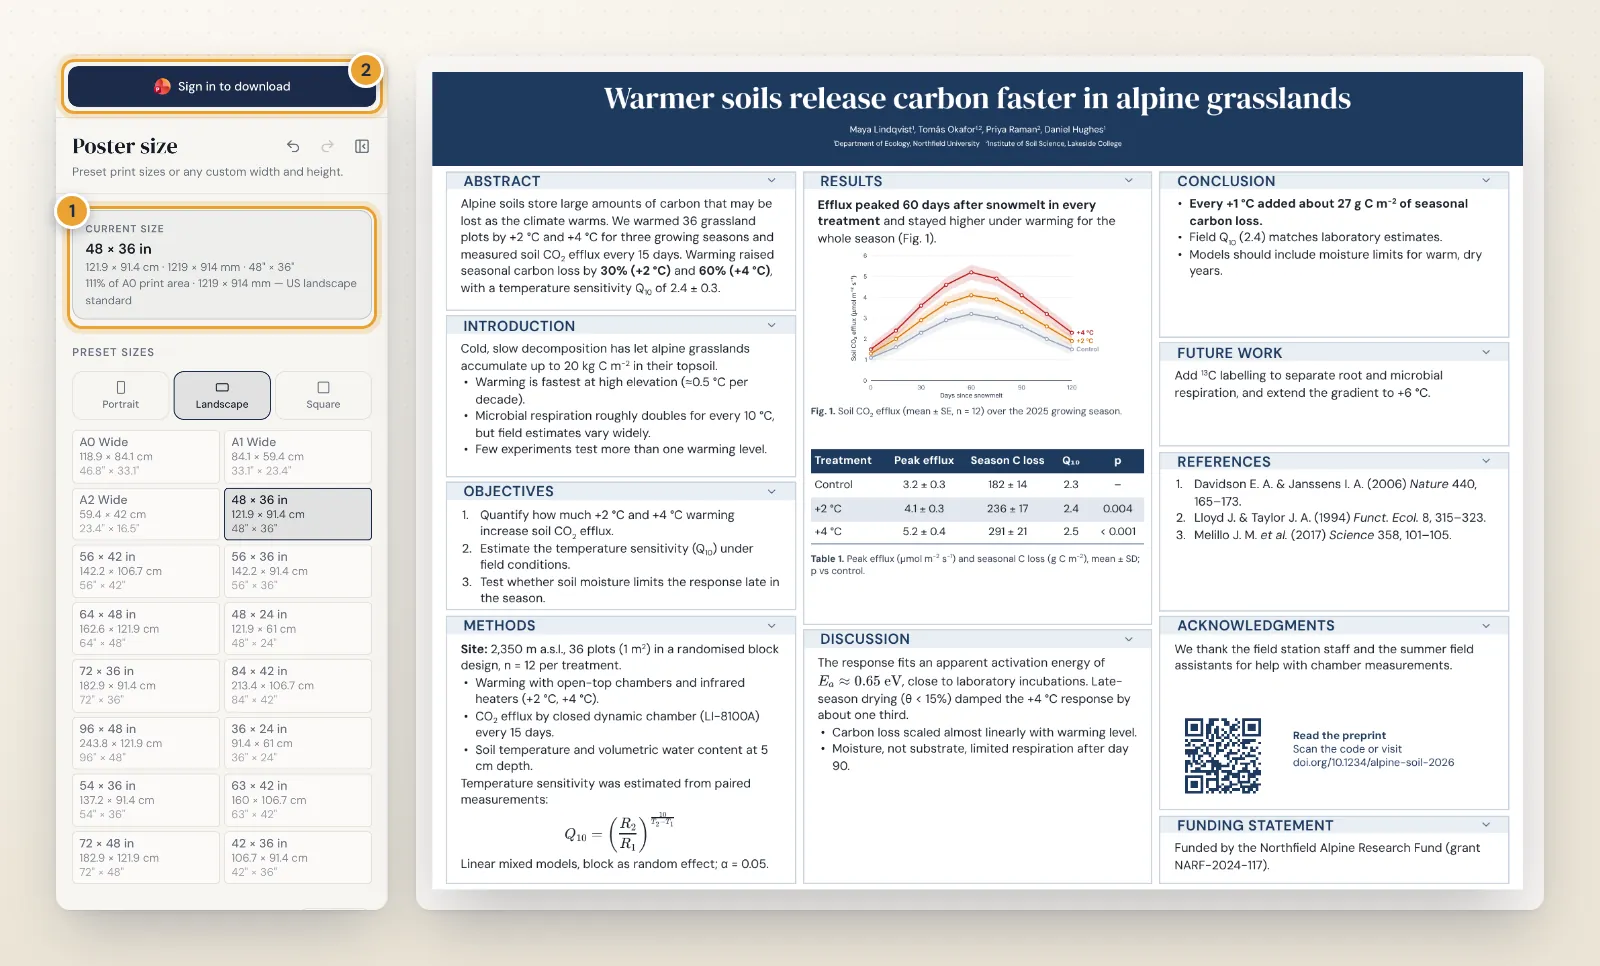
Read the conference instructions and set the poster to that size first. Changing size at the end is possible, but every text size and figure position depends on it. In the editor, the Size section lists preset print sizes in portrait, landscape and square, and a custom width and height for anything else. The current size is shown in centimetres, millimetres and inches, which makes it easy to compare with the instructions. When you switch sizes, the layout reflows instead of starting over.
If you are unsure which size to pick, the research poster size guide compares every standard format, and each size has its own page, for example A0 and 48 × 36 in.
2. Check the text at real size
Text that looks generous on a laptop is often too small on paper. For an A0 or 48 × 36 in poster, aim for:
| Text | Size on A0 or 48 × 36 in |
|---|---|
| Title | 85 to 120 pt |
| Authors and affiliations | 48 to 60 pt |
| Box headings | 36 to 54 pt |
| Body text | 24 to 32 pt, never below 20 pt |
| Captions and references | 18 to 24 pt |
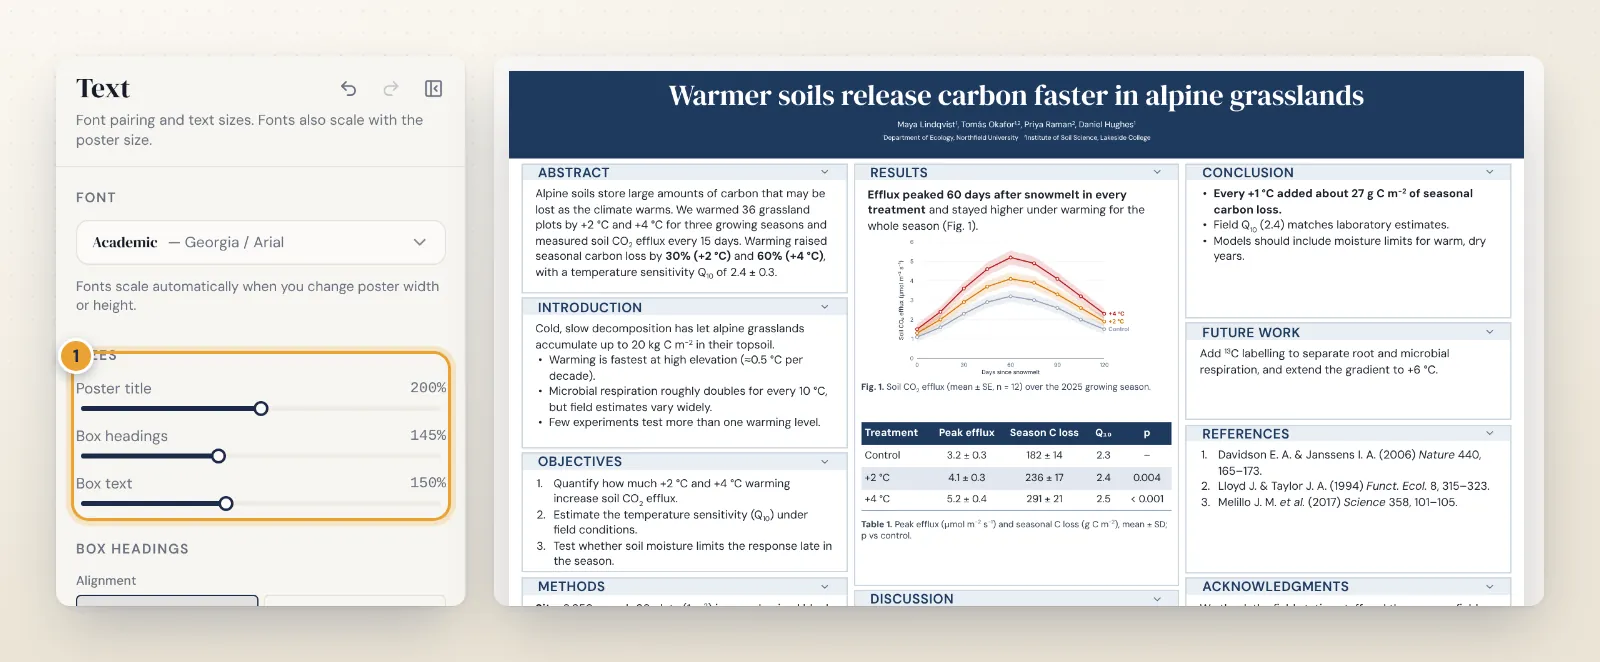
The Text section has sliders for the poster title, box headings and box text, and fonts also scale automatically when you change the poster size.
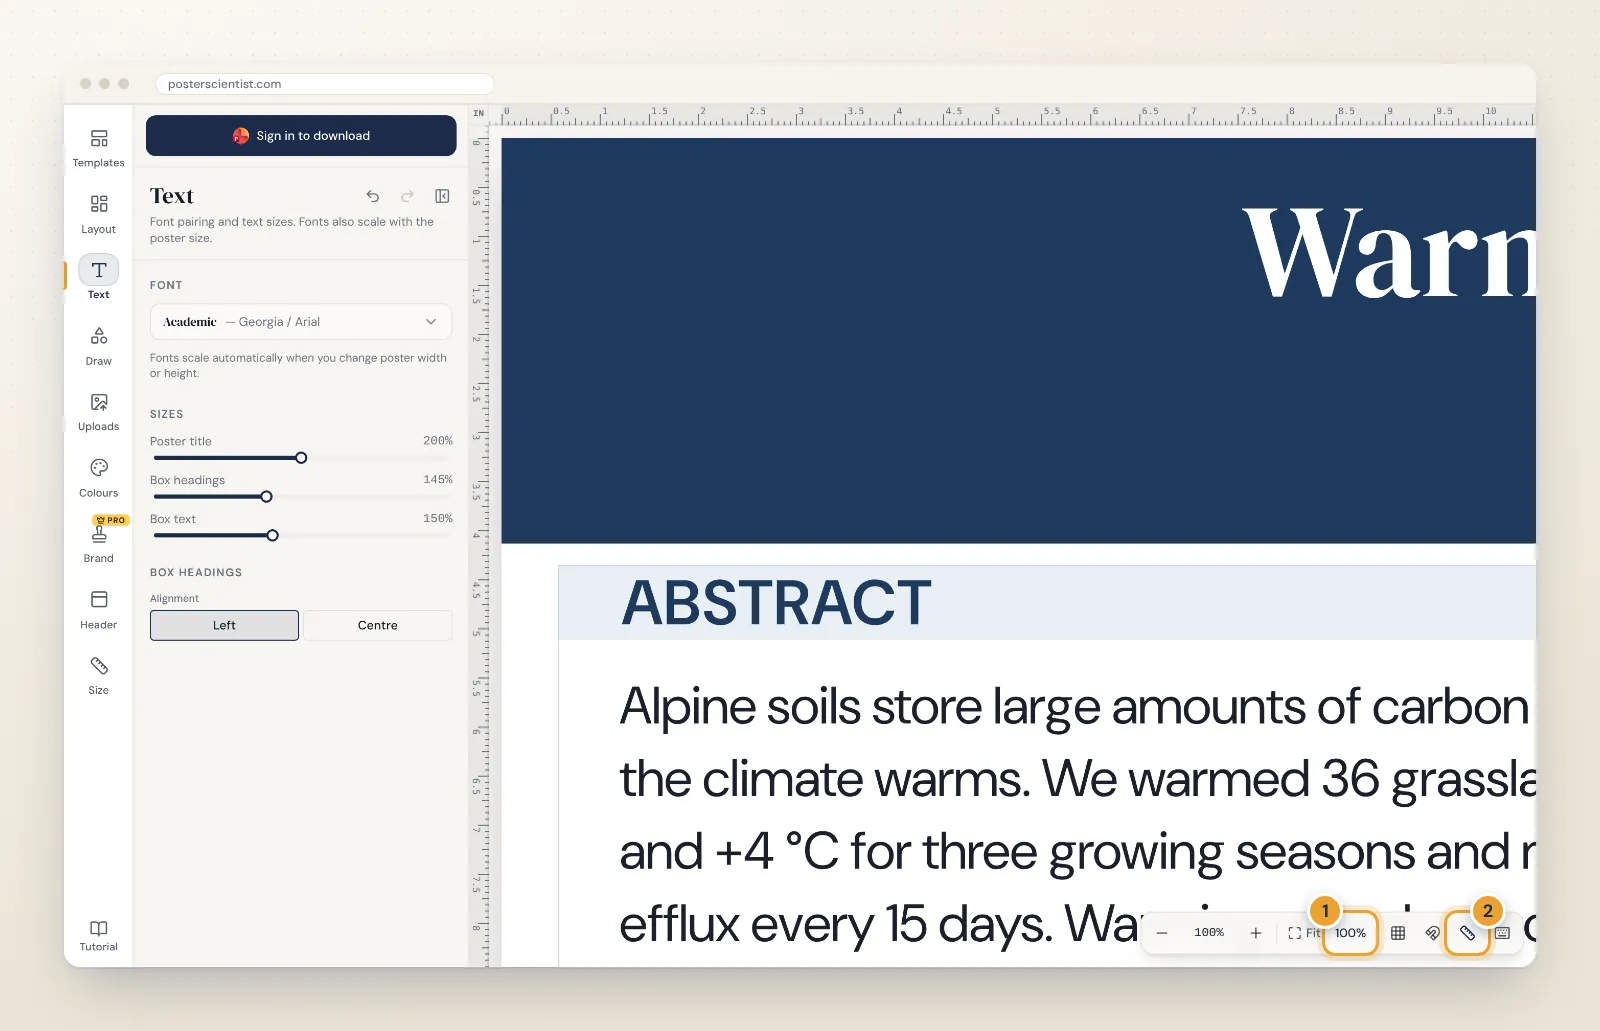
Then look at the poster at its true size. The 100% button in the view bar (or Shift+0) shows it at 96 pixels per inch, and the rulers show real centimetres or inches. If body text is uncomfortable to read at 100% from where you sit, it will be hard to read from two metres away at the session.
The most reliable test is still paper: print one section at 100 percent on an office printer, pin it to a wall and read it from two metres.
3. Make the figures sharp enough
Resolution is about pixels per inch at the printed size, not the number on the file. Uploaded images in the editor are kept at up to 3,000 pixels on the long side, so a figure printed 25 cm (10 in) wide has about 300 dpi and one printed 50 cm (20 in) wide has about 150 dpi. Practical rules:
- Export charts from R, Python, Prism or Excel at the size they will be printed, or as SVG.
- Never paste a screenshot of a chart. Re-export it instead.
- Crop photos to the part that matters, so the pixels you have are spent on it.
- Keep axis labels at least as large as the body text.
4. Export the PDF
With Pro: one click, at true size
The PDF download is a Pro Lifetime ($29 one-time at the launch price, regular $149) feature. It writes a single-page vector PDF at the poster's true size, with the fonts embedded, links kept clickable and any characters a font lacks (Greek letters, maths symbols, arrows) drawn with a fallback font so nothing turns into empty boxes. Photos and equations are placed as images inside the vector page.
Free: PowerPoint, then PDF
With a free account you can export PowerPoint or SVG, and you can turn either into a PDF yourself:
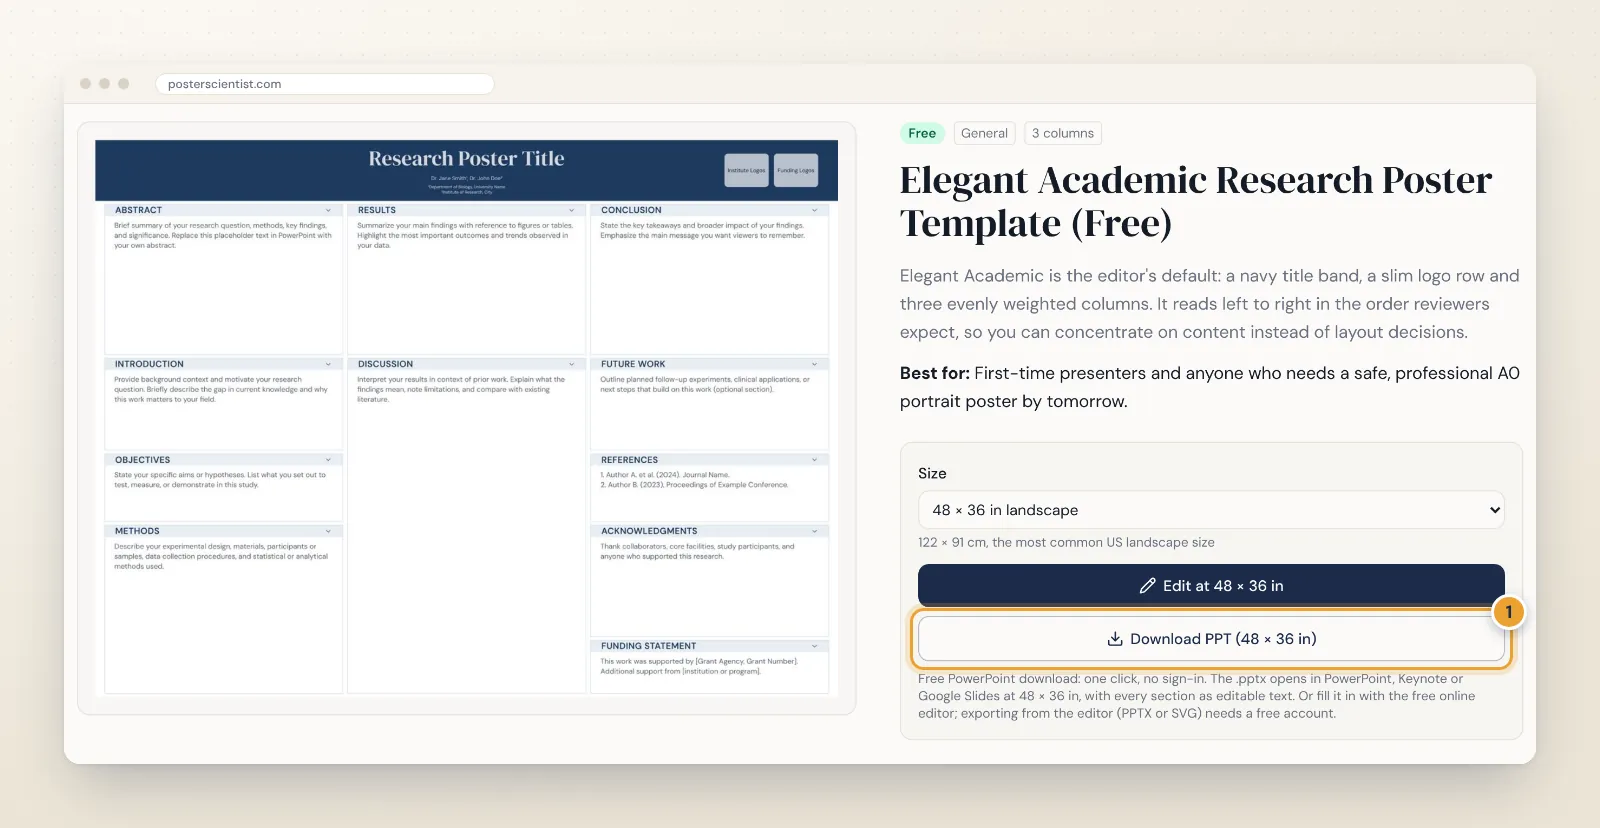
- Export the poster as PowerPoint (or download a free template from its page; no sign-in needed).
- Open it in PowerPoint and confirm the slide size under Design > Slide Size.
- Windows: File > Export > Create PDF/XPS, then choose Standard (publishing online and printing). Mac: File > Export, choose PDF and Best for printing.
- In Google Slides, File > Download > PDF document works too, and Keynote has File > Export To > PDF.
- Alternatively, open the SVG export in Inkscape (free) and save it as PDF.
PowerPoint slides can be at most 56 in (142 cm) on a side, so check the size of very large formats with your printer before converting.
5. Run the final check
Open the finished PDF, not the design file, and go through this list:
- Page size: File > Document Properties in Acrobat Reader shows it. It must match the conference size.
- Fonts: the Fonts tab lists every font as Embedded or Embedded Subset.
- Zoom to 100 and 200 percent and look at every figure for blur, jagged edges and tiny labels.
- Read names and affiliations letter by letter. Typos in a co-author's name are the most common regret.
- Scan the QR code from the screen at 100 percent; see the QR code guide for sizing.
- Print a scaled proof on A4 or letter paper. Colour, hierarchy and overall balance are much easier to judge on paper.
- Name the file clearly, for example Lastname_PosterNumber_48x36.pdf.
Talk to the printer early
Order at least a week before you travel. Ask about paper (matte avoids glare under conference lights), fabric options for posters that have to fold, file size limits and whether they want bleed. The complete guide to printing your poster covers paper types, timelines and costs.
Start from a file that is already the right size
Every one of the 23 free research poster templates opens in the editor at a real print size and downloads as an editable PowerPoint file in the standard sizes. Follow the step-by-step guide to making a research poster, or open the free research poster maker and set the size first.
Frequently asked questions
Is PDF export free in PosterScientist?
No. The print-ready PDF export is part of Pro Lifetime ($29 one-time at the launch price, regular $149). A free account exports PowerPoint and SVG, and every free template also downloads as a PowerPoint file from its template page without signing in. PowerPoint, Keynote and Google Slides can all save that file as a PDF.
How do I turn a PowerPoint poster into a PDF for printing?
Check the slide size first (Design > Slide Size), then in PowerPoint for Windows use File > Export > Create PDF/XPS and choose Standard (publishing online and printing). On a Mac use File > Export, pick PDF and Best for printing. In Google Slides use File > Download > PDF document.
What resolution should images be on a printed poster?
About 300 dpi at the printed size for figures with fine detail or small text, and 150 dpi is usually enough for photographs seen from a metre away. Charts look best as vector files, and an image 3,000 pixels wide gives 300 dpi at 25 cm (10 in) wide.
Do I need bleed and crop marks on a poster PDF?
Usually not. Most poster printers print with a narrow white border or trim the sheet themselves. If you want colour right to the edge, ask the printer: they will typically ask for 3 to 5 mm of bleed on every side.
Should I send my poster in RGB or CMYK?
Most university print shops and online poster printers accept RGB PDFs and convert them on their press. Only convert to CMYK if the printer asks for it, and expect very bright greens and blues to print slightly duller than they look on screen.
How can I check that the fonts are embedded in my PDF?
Open the PDF in Adobe Acrobat Reader and go to File > Document Properties > Fonts. Every font should be listed as Embedded or Embedded Subset. If one is missing, the printer's computer may swap it for another font and change your line breaks.